
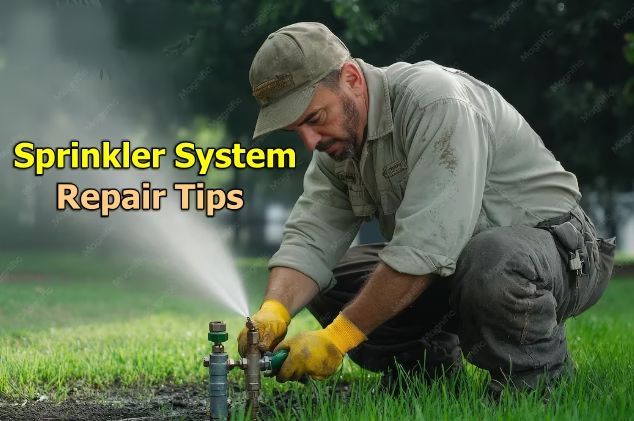
Whether you’re irrigating a 20-acre row crop or the backyard using a sprinkler, it is challenging if you are not maintaining it well.
Even if you maintain it well by daily monitoring of essentials like valves, pipes, motors, sensors, leakages happen for many reasons, affecting the sprinkler system adversely.
The good news? Most sprinkler problems are fixable without calling in a professional, as long as you know what to look for.
This guide walks through the most common sprinkler system issues, how to diagnose them, and step-by-step repair tips that work whether you’re running a residential drip-and-spray setup or a larger agricultural sprinkler network.
Before going to repair, make sure you have the necessary tools with you.
List of Tools Needed to Repair Sprinkler System
- Adjustable wrench and pliers
- Teflon tape (plumber’s tape)
- A small flathead and Phillips screwdriver
- Replacement nozzles and sprinkler heads matching your system
- A multimeter (for diagnosing electrical/valve issues)
- PVC pipe cutter and couplings
- A soft brush or old toothbrush for cleaning nozzles
- A garden trowel or shovel for accessing buried lines
- PVC Glue
For larger agricultural systems, you’ll also want spare diaphragms, O-rings, and filter screens sized to your specific valves, since irrigation-grade components often differ from standard residential parts.
Leaking Pipes and Fittings
Leakage is the common and costlier issue, wasting a lot of water while also losing system pressure.
Sometimes tiny leakages are not noticeable that easily. You only know them once you get the water bill.
Common Cause
- Old, brittle poly tubing splitting at connection points
- Cracked PVC pipe from freeze damage or ground shifting
- Loose or improperly sealed fittings
- Root intrusion cracking underground lines
How to Fix It
To fix the leakage, you must discover where the leak is happening by noticing water pooling, unusually lush grass, or a hissing sound when pressurized water goes out.
Once found, shut off the water to that zone, dig out the damaged section, and cut out the cracked portion of pipe using a PVC cutter. Install a coupling and new pipe section, applying PVC glue and cement, or a proper barbed fitting and clamp for poly tubing. Always wrap threaded connections with Teflon tape to prevent future leaks at the joint.
This works fine for most irrigation systems, but for bigger and deeper irrigation operations, you must rely on a pressure test with sections isolated one at a time. This helps narrow down the leak’s location before you start digging.
Sprinkler Head Not Popping Up
This is the common complaint in pop-up sprinklers used in home gardens and lawn beds.
Common Cause
- Debris or soil blocking the head
- Broken or worn internal spring
- Low water pressure preventing full extension
- Head buried too deep due to soil settling or turf growth
How to Fix It
Firstly, you have to dig around the pop-up sprinkler head, remove any soil or grass above the head if you have not used it for a long time, and clean it using a small brush.
If the head still won’t pop up under water pressure, unscrew it from the riser and inspect the internal spring and seal for wear.
If the internal mechanism is corroded or cracked, it’s usually faster and cheaper to replace the whole head rather than repair it.
However, if multiple heads in the same zone are underperforming, the issue is more likely pressure-related than a head-specific defect, which brings us to the next issue.
Sprinkler Zone Won’t Turn On
The entire sprinkler zone not turning on means the problem is electrical or the valve itself is not turning the zone on, not an individual sprinkler problem.
Common Cause
- Debris stuck in the valve diaphragm
- Faulty solenoid on the valve
- Broken or corroded wire connection
- Bad controller station or blown fuse
How to Fix It
Check that the valve is responding correctly by manually activating the zone directly from the controller panel. If nothing happens, test the wiring at the valve box using a multimeter. You’re looking for continuity issues or voltage drops.
A clicking sound from the solenoid when activated usually means the electrical signal is reaching the valve, but the valve itself is not opening, which points to a stuck diaphragm or debris inside the valve body.
To fix a stuck valve, shut off the water supply, unscrew the valve bonnet, and remove the diaphragm assembly. Rinse away any sediment or debris, inspect the diaphragm for tears, and reassemble.
If the solenoid itself doesn’t click at all, it likely needs replacing. These are inexpensive and typically screw directly into the valve body.
Zone Won’t Turn Off
This is the opposite problem, causing water waste if the situation is left unattended.
Common Cause
- Debris lodged in the valve, preventing it from closing
- Torn diaphragm
- Solenoid failure keeping the valve energized
How To Fix It
To stop the water waste, shut off the main water supply immediately, then open the valve and inspect the diaphragm for tears or debris caught in the seat.
Clean thoroughly and reassemble. If debris is a recurring problem, it’s worth installing or replacing the filter screen upstream of the valve, since sediment in the water supply is often the underlying cause.
Uneven Water Distribution
Uneven water distribution leads to dry patches because some heads barely dribble water while others spray forcefully.
Common Cause
- Leaks somewhere upstream in the line
- A partially closed main valve
- Too many heads running on a single zone (exceeding the system’s flow capacity)
- Pressure regulator failure
How To Fix It
Check whether the sprinkler zone and the individual sprinkler heads are working properly or not. If the irrigation network feeds rain guns or long lateral lines, pressure drop-off toward the end of the line is normal to some degree, but a dramatic difference usually points to an undersized pipe diameter or a partially clogged filter upstream.
After checking the sprinklers and rain guns, confirm that your main shutoff valve is fully open. This sounds obvious, but it’s one of the most frequently overlooked culprits.
Walk the zone and look for any wet patches in the soil that might indicate an underground leak between heads. If pressure is low across the entire system rather than a single zone, check your pressure regulator (if installed) for buildup or failure, and test your water source pressure with a pressure gauge attached to a hose bib.
Clogged Nozzles and Emitters
Clogging is common where the water source is hard or contains sediment, like a well or river.
Common Cause
- Dirt and sand in the water supply
- Mineral scale buildup
- Algae growth in stagnant lines
- Insects nesting inside heads during the off-season
How To Fix It
If you use the sprinkler during summer, then you must clean it and check the nozzles and springs when the season ends. If the sprinkler is made from brass, spray or clean it using oil so it does not rust.
For drip emitters, the small orifice can clog easily. Flushing the line at full pressure with the end caps removed often clears loose debris.
If clogging is a recurring issue, installing or upgrading your filtration system at the point where water enters your irrigation network will save you significant time in the long term.
Controllers and Timer Malfunctions
If the system runs at the wrong time, skips zones, or doesn’t run at all, the first blame must go to the controller rather than the sprinkler itself.
Common Cause
- Dead backup battery losing saved settings
- Power interruption resetting the programming
- Corroded wire terminals inside the controller box
- Faulty transformer
How To Fix It
Check that the power supply to the controller is consistent and the backup battery (if applicable) isn’t depleted.
Reprogram your watering schedule and test each zone manually to confirm the controller is sending signals correctly.
If a specific zone consistently fails to activate through the controller but works when the valve is manually opened, the issue is likely a wiring fault between the controller and that valve. Trace the wire run for damage, particularly at points where it might have been nicked by a shovel or chewed by rodents.
Seasonal Maintenance Tips to Avoid Repairs
To prevent emergency sprinkler system repairs, a little routine maintenance is enough.
Spring Startup Checklist
- Slowly open the main water valve to avoid pressure surges.
- Run each zone individually and check for even coverage.
- Inspect heads for winter damage.
- Clean filters and check for sediment buildup.
Mid-Season Checks
- Walk the system monthly to catch leaks early.
- Adjust head height as grass or crops grow.
- Check for tilted or sunken heads after mowing or fieldwork.
Fall Winterization
- Shut off the water supply.
- Blow out lines with compressed air in freeze-prone regions to prevent cracked pipes.
- Drain backflow preventers and valves.
- Store above-ground components indoors if applicable.
Also, make sure to regularly clear any obstacles around sprinkler heads, valves, and pipes. Ensure that your system is functioning unobstructed to achieve even and effective watering.
Final Thoughts…
The above scenarios you can manage as DIY sprinkler system repairs. However, sometimes you must call professionals to do the work, in situations like:
- Main line breaks requiring trenching across large areas
- Persistent pressure problems tied to your municipal water supply or well pump itself
- Backflow preventer failures, which often involve code compliance issues
- Complete controller replacement requiring rewiring of multiple zones
If you don’t have the confidence or the tools to repair it, then you must call professionals.
Most of the culprits, like pressure problems, clogs, physical damage, and electrical faults, can be solved by DIY. Once you know how to diagnose them, fixing the problem is usually a matter of an hour and a few dollars in parts rather than an expensive service call.
Staying ahead of small issues with routine seasonal maintenance will save you far more in water, time, and crop or lawn health than waiting until something breaks completely.
Leave a Reply